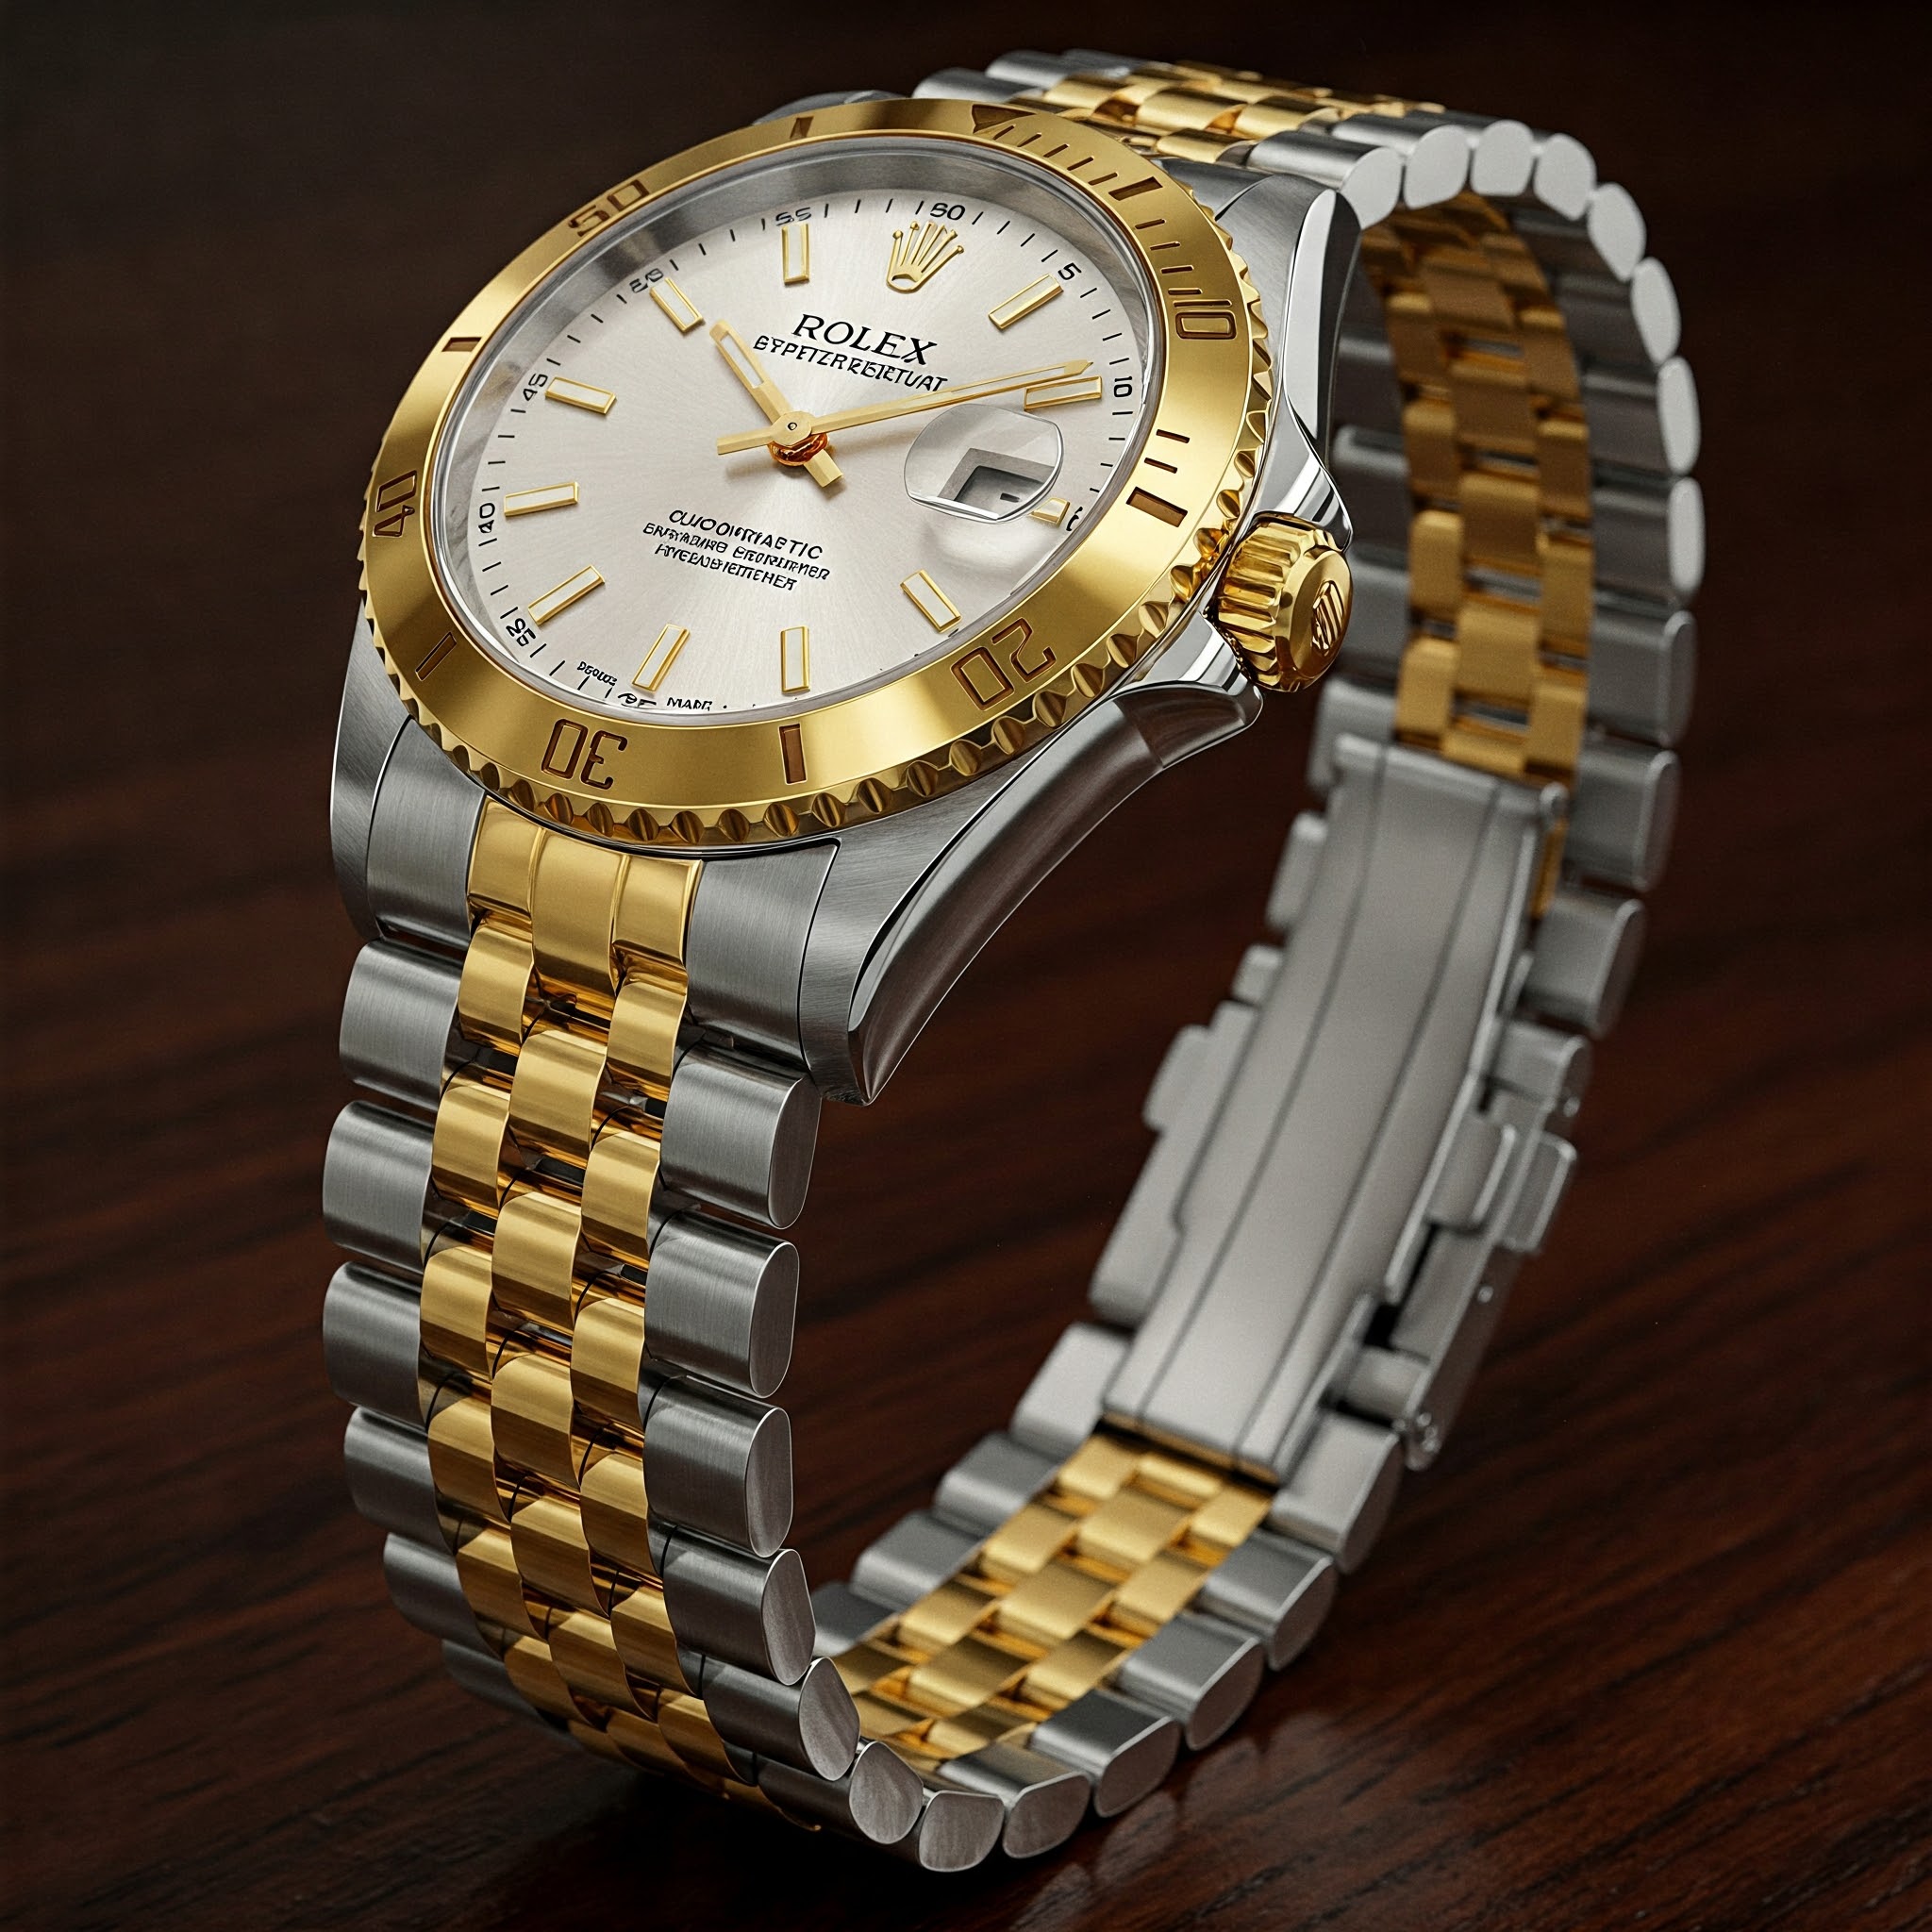
I remember the first time I bought a high-end timepiece. It was a stunning stainless steel piece that caught every bit of light in the room. However, when I put it on, it hung off my wrist like a loose hula hoop. It felt clumsy, and honestly, it took away from the excitement of the purchase. I faced a choice: drive 40 minutes to a jeweler and pay $25, or learn how to resize a metal watch bracelet myself. I chose the latter, and I’ve never looked back. Adjusting a metal watch strap is one of those basic “adulting” skills that feels incredibly satisfying once you nail it.
✨Was this helpful? Spread the word! 🚀
Whether you just grabbed a new Seiko, a Citizen, or even a luxury Rolex, knowing how to resize a watch at home is a game-changer. You don’t need a degree in mechanical engineering, just a little patience and the right tools. In this guide, I’m going to walk you through the entire process, from identifying link types to the final “click” of a perfectly fitted clasp.
Quick Comparison: DIY vs. Professional Service
Before we dive into the nitty-gritty of metal watch bracelet resizing, let’s look at why you might want to do this yourself versus taking it to a pro.
| Feature | DIY Resizing | Professional Jeweler |
| Cost | One-time tool cost ($15-$40) | $15 – $50 per visit |
| Time | 10-15 minutes at home | Commute + Wait time |
| Convenience | Immediate | Requires an appointment/trip |
| Risk | Moderate (if rushed) | Low (professionally insured) |
| Learning Curve | Simple | None required |
| Satisfaction | High (Sense of accomplishment) | Low |

Top 7 Watch Sizing Kits: Expert Analysis
If you want to master how to resize a metal watch bracelet, you need a decent kit. You can’t just use a steak knife and a prayer. I’ve spent hours researching the best-selling and most reliable kits available on Amazon to ensure you have the right gear for the job.
1. Paxcoo Watch Band Removal Tool Kit
This is arguably the most popular entry-level kit for those learning how to adjust watch links. It is straightforward and covers the basics for most friction-pin bracelets.
-
Technical Specifications: Includes a blue plastic link remover, 3 spare pins, a dual-head hammer (rubber/steel), and a stainless steel pin punch set.
-
Professional Applications: Ideal for hobbyists and occasional users who need to resize watch links metal on standard consumer brands like Fossil, Invicta, or Michael Kors.
-
Customer Review Analysis: Users love the affordability. One reviewer noted, “It paid for itself in one use.” However, some mentioned the plastic body of the link remover can flex if the pins are stuck.
-
Pros: Very affordable, includes extra pins, easy to store.
-
Cons: Not suitable for high-end screw-link bracelets; plastic components feel a bit cheap.
2. Vastar Watch Repair Kit
The Vastar kit is a step up, offering a wider variety of tools for more complex tasks beyond just resizing metal watch band links.
-
Technical Specifications: 147-piece set, featuring an adjustable case opener, anti-magnetic screwdrivers, and a spring bar tool.
-
Professional Applications: Suitable for those who want to change batteries and perform light maintenance in addition to resizing.
-
Customer Review Analysis: Reviewers frequently praise the variety of tools. The screwdrivers are noted for being surprisingly decent for the price point.
-
Pros: Comprehensive, includes a carrying case, versatile.
-
Cons: Some tools in the large kit may never be used by a beginner.

3. Eventronic Watch Repair Kit
This kit focuses on durability. If you’re worried about breaking pins while learning how to resize a watch at home, this is a solid choice.
-
Technical Specifications: Features a nylon and steel hammer, 3 different sizes of pin punches (0.8mm, 0.9mm, 1.0mm), and a metal watch band holder.
-
Professional Applications: Great for stiff bracelets where a plastic remover might fail.
-
Customer Review Analysis: “The metal band holder is the star here,” says one pro-sumer. It keeps the watch steady so you don’t scratch the finish.
-
Pros: Sturdy metal construction, better stability, precise punches.
-
Cons: The “instruction manual” is often reported as being a bit vague.
4. Bergeon 6767-F Spring Bar Tool
While not a full kit, this is the “gold standard” for anyone serious about watchmaking. Bergeon is a Swiss brand used by professionals worldwide.
-
Technical Specifications: Hardened stainless steel construction with a fine 0.8mm fork end and a pointed tip.
-
Professional Applications: Essential for removing spring bars and making micro-adjustments on luxury clasps.
-
Customer Review Analysis: Professionals swear by this. “I’ve used mine for 5 years and the tip hasn’t bent,” says a certified watchmaker on a popular forum.
-
Pros: Incredible durability, Swiss-made precision, won’t slip as easily as cheap versions.
-
Cons: Pricey for a single tool; doesn’t include a hammer or punch.
5. STREBITO Watch Repair Tool Kit
This is a modern, high-quality 142-piece kit that feels more premium than the standard budget options.
-
Technical Specifications: Includes high-strength S2 steel screwdriver bits and a specialized link remover with an adjustable base height.
-
Professional Applications: Excellent for modern watches with different bracelet thicknesses.
-
Customer Review Analysis: Users appreciate the “organized” nature of the case and the strength of the bits.
-
Pros: High-quality materials, adjustable base for thick watches, very organized.
-
Cons: Larger footprint than other kits.
6. EZCO Watch Link Remover Tool
If you just want one specific tool to do one specific job—removing pins—this is it.
-
Technical Specifications: All-metal construction with 3 replacement pins. Designed specifically for the “push” method.
-
Professional Applications: Perfect for travelers or those who only own watches with friction pins.
-
Customer Review Analysis: “Does exactly what it says,” is the common sentiment. It’s compact and tough.
-
Pros: Small, durable, very easy to use.
-
Cons: Only works for friction pins; won’t help with screw-in links.
7. Esslinger Watch Tool Kit
Esslinger is a reputable name in watch parts and tools. Their “Essential” kit is curated for quality over quantity.
-
Technical Specifications: Includes a high-quality link remover, a specialized “watchmaker’s hammer,” and a deluxe spring bar tool.
-
Professional Applications: Targeted at the entry-level enthusiast who wants tools that will last a lifetime.
-
Customer Review Analysis: Often cited as the best “gift” for a new watch collector. The quality is a noticeable step up from the $15 kits.
-
Pros: High-quality curation, reputable brand, reliable performance.
-
Cons: More expensive than generic kits.
✨ Don’t Miss These Exclusive Deals!
🔍 Ready to start your DIY journey? Check out these top-rated kits. Click any link to see the latest prices on Amazon and get your watch fitting perfectly by the weekend! ✨
💬 Just one click – help others make better buying decisions too!😊
Feature Matrix: Top 7 Watch Sizing Tools
| Product Name | Primary Material | Best For | Precision Level |
| Paxcoo Kit | Plastic/Steel | Beginners | Basic |
| Vastar Kit | Multi-material | Full Maintenance | Moderate |
| Eventronic Kit | Metal/Nylon | Stiff Pins | High |
| Bergeon 6767-F | Swiss Steel | Micro-adjustments | Professional |
| STREBITO Kit | S2 Steel | Modern Thick Watches | High |
| EZCO Remover | All-Metal | Quick Pin Removal | Moderate |
| Esslinger Kit | Professional Grade | Enthusiasts | Professional |
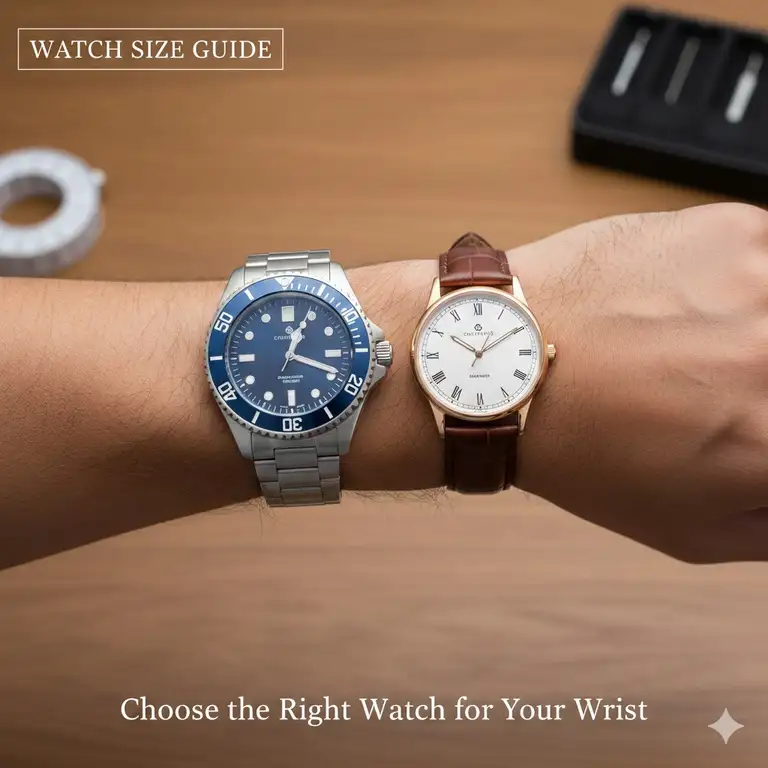
Understanding Your Bracelet: The First Step
Before you start hammering away, you must identify what kind of “connection” your bracelet uses. Not all metal watch bracelet resizing is the same! If you treat a screw-link like a friction-pin, you’re going to have a very bad (and expensive) day.
1. Friction Pins (Split Pins)
These are the most common. If you look at the inside of your watch bracelet, you’ll see small arrows. These arrows indicate which way the pin should be pushed out. The pin itself looks like a tiny bobby pin folded in half.
2. Screw-In Links
Found on higher-end watches (think Rolex, Tudor, or higher-end Seikos). These require a tiny precision screwdriver. There are no arrows here because the screw can come out from either side, though it’s usually only threaded on one.
3. Simple Spring Bars
Some bracelets use spring bars between the links, though this is rare in modern bracelets. These are more common at the clasp for micro-adjustments.
4. Folded Links
Usually found on vintage or very inexpensive watches. These require a flathead screwdriver or a specialized tool to “unfold” a metal tab.
Tool Compatibility Table
| Link Type | Required Tool | Difficulty |
| Friction Pin | Link Remover or Hammer/Punch | Low |
| Screw-In | Precision Screwdriver (1.2mm-1.6mm) | Moderate |
| Spring Bar | Spring Bar Tool (Pointed end) | Low |
| Folded Link | Small Flathead / Pliers | High |

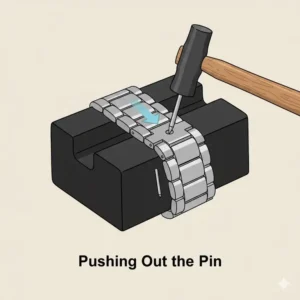
Step-by-Step Guide: How to Resize a Metal Watch Bracelet (Friction Pins)
This is the method 90% of you will use. Let’s get into the details of removing links from watch bracelet.
Step 1: Measure the Excess
Put the watch on your wrist. Pinch the slack until the watch sits exactly where you want it. Count how many “extra” links you have.
Pro Tip: Always remove links evenly from both sides of the clasp. This ensures the clasp stays centered on the underside of your wrist. If you have 3 links to remove, take 2 from one side and 1 from the other.
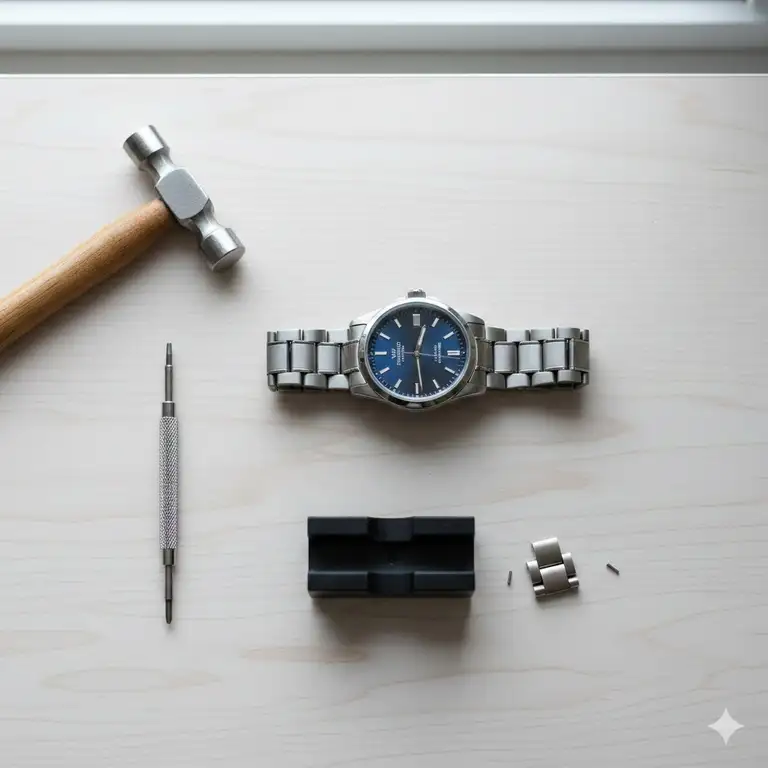
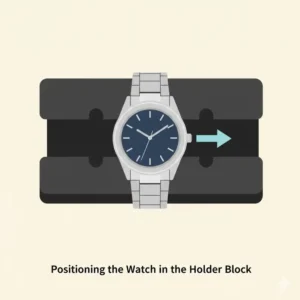
Step 2: Set Up Your Workspace
Lay down a microfiber cloth. These tiny pins love to roll away and disappear into the abyss of your carpet. Use a watch block or a holder from your kit to keep the bracelet steady.
Step 3: Follow the Arrows
Look for the arrows on the back of the links. Position the pin punch (or the tip of your link remover tool) against the pin head. Ensure you are pushing in the direction of the arrow.
Step 4: Pushing the Pin
If using a twist-style remover:
-
Align the pin with the tool’s pusher.
-
Slowly turn the handle. You’ll feel resistance, then a “pop” as the pin moves.
-
Continue until the pin is far enough out to grab with your fingers or pliers.
If using a hammer and punch:
-
Place the punch on the pin.
-
Give it a few light, steady taps with the hammer.
-
Once it clears the other side, pull it out.
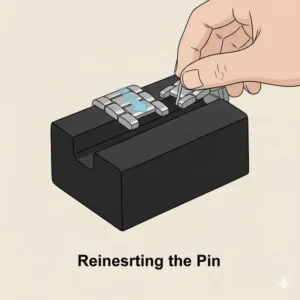
Step 5: Remove the Link
The bracelet will now separate. Repeat the process to remove the unwanted link. Keep these spare links and pins in a small Ziploc bag—you might need them if you sell the watch or if your wrist expands in the summer.
Step 6: Reassembling
To put the bracelet back together, join the two remaining ends. Insert the pin opposite to the direction of the arrow.
Step 7: The Final Seat
The pin will likely stick out a tiny bit. Use the plastic/rubber side of your hammer to gently tap it back in until it’s flush with the link.
Benefits of DIY Watch Sizing
| Benefit | Explanation |
| Cost Savings | Save $20-$50 every time you buy a new watch. |
| Custom Fit | You can take your time to get the “perfect” fit, not just “good enough.” |
| No Scratches | You care more about your watch than a busy mall jeweler might. |
| Skill Building | Understanding how your watch works builds a deeper appreciation for the hobby. |
How to Adjust Watch Links with Screws
If you’re lucky enough to have a bracelet with screws, the process is slightly different. This is often seen in metal watch bracelet resizing for luxury brands.
-
Use the Right Bit: Ensure your screwdriver fits the slot perfectly. A bit that is too small will slip and “burr” the screw head, ruining the look of the watch.
-
Heat if Necessary: Some manufacturers use blue Loctite (thread locker). If the screw won’t budge, use a hairdryer to heat the link for 30 seconds. This softens the glue.
-
Steady Pressure: Press down firmly while turning counter-clockwise.
-
Secure the Screw: When putting it back, don’t over-tighten. A “snug” fit is all you need.
The Secret of Micro-Adjustments
Sometimes, removing a whole link makes the watch too tight, but keeping it makes it too loose. This is where “micro-adjustments” come in. Most metal clasps have 3-5 tiny holes on the side.
Using the pointed end of your Bergeon 6767-F or a similar spring bar tool, depress the spring bar inside the clasp and slide it to a different hole. This allows for adjustments of about 2-3mm, which is often the difference between a watch that slides around and one that sits perfectly.
Performance Metrics: Sizing Accuracy
| Method | Adjustment Increment | Precision |
| Removing 1 Link | ~10mm | Low |
| Removing Half-Link | ~5mm | Moderate |
| Micro-Adjustment Hole | ~2mm | High |
| Glidelock/Tool-less Clasp | ~1mm | Very High |
Common Mistakes to Avoid
Even if you know how to resize a watch at home, mistakes happen. Here’s how to stay safe:
-
Forcing the Pin: If it doesn’t move with moderate pressure, stop. You might be pushing the wrong way or the pin might be a “sleeve and pin” system (common in Seikos), which is much trickier.
-
Losing Parts: I can’t stress this enough—use a tray!
-
Working on a Hard Surface: Never do this on a glass or granite table without a cloth. You will scratch the watch or break the table.
-
Neglecting the Arrows: Pushing against the direction of the arrow can wedge the pin permanently or bend the link.
Requirements Analysis for Success
| Requirement | Importance | Why? |
| Good Lighting | Critical | You need to see the tiny arrows and pin heads. |
| Steady Hands | High | Prevents the tool from slipping and scratching the steel. |
| Magnification | Optional | A jeweler’s loupe helps if your eyesight isn’t 20/20. |
| Patience | Mandatory | Rushing leads to bent pins and frustration. |
Deep Dive: Pin and Collar Systems
If you own a Seiko Monster or certain Omega models, you might encounter the “Pin and Collar” system. This is the “final boss” of how to resize a metal watch bracelet.
In this system, a tiny metal tube (the collar) sits inside the link. When you push the pin out, the collar often falls out too. If you lose that collar, the pin will simply slide out, and your watch will fall off your wrist.
How to handle it:
-
Watch very closely when the pin exits.
-
Look for a tiny tube. It might be in the middle of the link or at the end.
-
Use tweezers to hold the collar in place when reassembling.
-
Insert the pin through the collar.
Solution Category Comparison
| System | Difficulty | Stability | Common Brands |
| Split Pin | Easy | Good | Fossil, Casio, Citizen |
| Screw-In | Moderate | Excellent | Rolex, Tudor, Omega |
| Pin & Collar | Hard | Superb | Seiko, Breitling |
✨ Ready to take control of your collection?
🔍 Don’t let a loose bracelet ruin your style. Pick up one of these expert-recommended tool kits today and experience the satisfaction of a custom-fit watch. Click any of the product links above to find the best deal on Amazon! ✨

Conclusion
Learning how to resize a metal watch bracelet is a rite of passage for any watch enthusiast. It transforms you from a mere consumer into someone who truly understands their timepiece. Whether you choose a budget-friendly Paxcoo kit or go all-in with professional Bergeon tools, the ability to adjust your own watch provides a level of freedom that’s worth every penny.
Remember to work slowly, follow the arrows, and keep those spare links safe. A well-fitted watch is more comfortable, looks more professional, and reduces wear and tear on the bracelet itself. Now that you’ve got the knowledge, it’s time to get that perfect fit!
FAQs
✅ While possible with a thumbtack and small hammer, it's risky. Specialized tools like the Paxcoo or Vastar kits prevent scratches and bent pins. Investing $15 in a proper tool is cheaper than repairing a ruined $200 bracelet...
✅ Look for small engraved arrows on the underside of the links. You must always push the pin in the direction the arrow is pointing. When reinserting, push it back in against the direction of the arrow...
✅ Many brands use thread-locking adhesive. Apply gentle heat with a hairdryer for 30-60 seconds to soften the bond. Ensure you use a precision screwdriver that fits the slot perfectly to avoid stripping the head...
✅ Start by removing links evenly from both sides. However, if you have an odd number of links to remove, take more from the 6 o'clock side. This helps pull the watch head toward you for better visibility...
✅ Most Milanese bands don't have links. Instead, they use a sliding clasp. Use a small flathead tool to flip up the tension tab on the clasp, slide it to your desired position, and snap it back down... ❓ Can I resize a metal watch bracelet without specialized tools?
❓ How do I know which direction to push the pins?
❓ What should I do if a screw is stuck in my watch link?
❓ Is it better to remove links from the 12 o'clock or 6 o'clock side?
❓ Can I resize a Milanese or mesh metal watch band?
Recommended for You
- Gold Watches for Women: 7 Stunning Timepieces That Elevate Any Outfit
- 7 Best Invicta Gold Watch Mens Options That Dominate 2025 Style Rankings
- Ladies Watch Straps Replacement: Top 7 Expert-Reviewed Options 2025 for a Fresh New Look
Disclaimer: This article contains affiliate links. If you purchase products through these links, we may earn a small commission at no additional cost to you.
✨ Found this helpful? Share it with your friends! 💬🤗